...

How to Clean a Yoga Mat

Here’s how to clean a yoga mat:

There are three ways on how to clean a yoga mat: by lightly hand washing, submerging it in a tub and hand washing, or washing it in the washing machine.
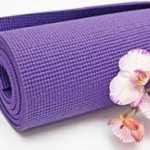
how to clean a yoga mat
How to clean a yoga mat

How to clean a yoga mat by handwashing

If your mat is only slightly soiled, spray it with a solution of water and a very small bit of mild dish soap. Use a clean, damp sponge or clean terry cloth rag. Wash the entire mat. Use a clean cloth, only dampened with clean water, to wipe the mat. Dry with a towel, then let air dry.

How to clean a yoga mat by handwashing in bathtub

If you haven’t washed your mat in a long time or it is particularly soiled, you may want to do a more heavy duty cleaning of your yoga mat. Fill your bathtub with warm water and a bit of mild detergent. Submerge the yoga mat and hand wash it using a clean cloth. Rinse with clean water. Towel dry then let air dry.

How to clean a yoga mat by machine washing

Put the yoga mat by itself into the washing machine and using a mild detergent for delicates, run it through the gentle or delicates cycle. Let air dry.

It is important to keep your yoga mat clean, but do not over wash your your yoga mat.

One way to speed up the drying process is to roll up your mat with a towel and squeeze excess water out.

Whatever method you choose to clean a yoga mat, be sure your yoga mat is completely dry before rolling it up. In between classes, it is actually a good idea to hang your mat rather than leave it rolled up.

And that is how to clean a yoga mat!

Baseball Gloves

Now that summer is over many of you will be putting away your baseball & softball gloves until “spring training” next spring. Here is some advice on how to keep that glove in top shape and ready for next season Many types of treatments and care have been suggested over the years for baseball and softball gloves.
Some of these are safe and some, unfortunately, may damage glove leather. We recommended that one of the best and safest leather cleaners and conditioners is untreated petroleum jelly. Professional glove repairmen and leather specialists agree that this is one of the best applications, both for cleaning and conditioning glove leather.
During the break-in period, treat your new glove with a light application, working it into the leather. This will reduce the stiffness of the new leather and facilitate a faster and more comfortable breaking in procedure. Also, at the end of the season, take a generous amount of petroleum jelly and thoroughly cover the outside and inside of the glove.
Don’t ignore the laces or hard to-get-to areas, both inside and outside the glove. Then take a clean rag and wipe off excess to remove grit and grime. This will also remove and help neutralize much of the salt and acid buildup inside the glove caused by perspiration, a chief problem to the leather lining, usually made of softer leather. We do not recommend neatsfoot oil, linseed oil or silicon-type spray as these tend to close the pores of the leather, causing it to dry, harden, and become heavy over an extended period of time and through repeated use. Petroleum jelly keeps the pores open and in effect, keeps the leather “alive” while also providing a softening condition.
Basically remember that leather is skin and leather experts tell us not to treat glove leather any differently than you would your own skin. Prolonged harsh temperatures, excessive water soaking (especially use of hot water), abrasives, the salt and acids produced from perspiration and excessive dryness all or individually can be harmful to the glove leather.
Also, continued exposure to sunlight may result in fading of the leather color. Be careful about sealing gloves in plastic bags for over 12 months. We hope this gives all you players a good idea on how to care for your glove until the next time you hear those words so near and dear to our hearts – PLAY BALL!!

error

Enjoy this website? Please spread the word :)

Instagram
Follow by Email
RSS