...

Top 5 Carpet Stain Removal Mistakes

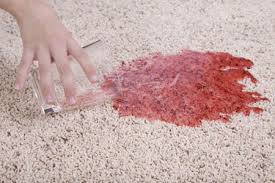
Carpet stain removal can be a challenge. To get the best results, avoid these top 5 carpet stain removal mistakes:

  1. Start spraying chemicals – Please DON’T do this! It is unnecessary if you act quickly in removing the stain.  Using a dry towel, tamp down and absorb as much of the stain first, or scoop or scrape up as much as you can.  Over loading stain with chemicals is a sure way to set stains and make them harder to remove. Only after you have done this should you introduce chemicals. Use measured amounts, being sure to rinse the chemicals out so if the stain persists, you are not mixing chemicals by trying different products together. Leaving chemical or soap residue will only attract dirt faster once the area is dry.
  2. Use heat on stain – The default should ALWAYS be to USE COOL WATER.
    carpet stain removal
    Carpet Stain Removal Mistakes

    Using heat on some stains, like dairy products, will set them. Certain stains will respond to warm or hot water but if you do not know what the stain is use cool water always.

  3. Scrubbing scrubbing scrubbing – BE GENTLE. When cleaning, we often scrub the back and forth action which works well when you are cleaning pots and pans, but it just doesn’t work for carpets. Most carpets have an underlay. The scrubbing and pushing action just pushes the stain deeper into the carpet and underlay.  You have to be thinking about how to lift the stain from the carpet. Vigorous scrubbing only makes it harder to remove.
  4. Leave stain 100% of the time, LEAVING THE STAIN UNTIL LATER WILL MAKE IT HARDER TO REMOVE. In the worst-case scenario, if you have to leave a spill on carpet, place a dry towel on top of a spill so some of it can soak into the towel. And only use a white or light colored towel to avoid any possible color transfer from the towel to the carpet. Leaving stain to dry will set the stain most of the time.
  5. Not pre-testing – When using any new cleaning chemicals, ALWAYS PRE-TEST in a small, inconspicuous area of carpet. You always want to be sure the cleaning chemicals won’t react with carpet and cause damage to the surface you are cleaning.

Check out this tip on how to clean urine from carpets.

How to Get Rid of Dust Mites

How to Get Rid of Dust Mites

dust mite allergies
Dust mite allergies

Learning how to get rid of dust mites is important in order to help control allergic reactions in your home.

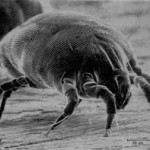
Dust mites feed on organic materials such as flakes of shed human skin and flourish in the stable environment of dwellings. House dust mites are a common cause of asthma and allergic symptoms worldwide. The mite’s gut contains potent digestive enzymes that persist in their feces and are major inducers of allergic reactions. The mite’s exoskeleton can also contribute to allergic reactions. Here is a natural remedy for the control of dust mites.

dust mites
How to get rid of dust mites

Researchers at Alexandria University in Egypt found certain essential oils to be effective at killing dust mites, the invisible-unless-under-a-microscope creatures that tend to live in bedding, carpets, furniture and drapes. If you want to keep your allergies at bay, eucalyptus and clove were proven to be the most effective oils for eliminating household dust mites.

Here are three tips on how to get rid of dust mites:

  • Add around 10 drops of an oil in with your laundry detergent when you wash your sheets in hot water.
  • Fill a spray bottle with 1 quart of water and 20 drops of an oil to spray on upholstery.
  • Put baking soda in a sifter and add in 10 drops of an essential oil to shake across carpeting. Then leave the mixture on the floor for 30 minutes and vacuum it up.

    essential oils
    How to get rid of dust mites using essential oils

By learning how to get rid of dust mites, you can control and limit their impact in your home.

Built in vacuum plugged? Make it suck again.

Built in vacuums are great. They have many advantages over tradition vacuums, in that they are more powerful, require emptying less often, deliver dust AWAY from the main living areas, and the hose is light and easy to use on stairs and in tight corners.

There are some dis-advantages too. Because they need emptying less frequently, they often don’t get emptied at all! And because they are more powerful, some people try to suck up everything from pine cones to toys to small family pets. And that long hose? All it takes is an errant piece of stalk from a Wisk broom to start clogging everything up. These problems often create another big disadvantage, which is when the vacuum does get blocked up, there is often no easy way to clean out the system.

vacuumThe first task is to determine if the blockage is in the main vacuum canister itself, in the PVC piping, or in the hose or attachment. The first thing to check is the main vacuum canister, usually located in the basement, garage, or utility room. Is the bag full? Empty it to be sure and get the maximum suction. Is the vacuum portion of the unit sealed tight? Are there evident blocks in the PVC pipe that lead into the canister?

Try turning the vacuum on with the manual switch at the canister, and then open the closest hose receptacle to the main unit. If there is strong suction, try plugging in the attachment hose. If there is no suction on the hose, then the hose itself is where your blockage can be found.

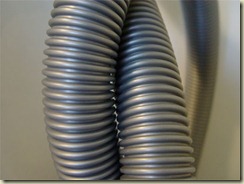
Usually, by plugging in the hose, and going down the length of the hose, bending and jiggling it, one will dislodge the debris that is caught. Be sure the hose is plugged in, and the vacuum is on, so the debris will be sucked out as you dislodge it. If this does not work, get a broom handle (or similar thick piece of round wood) and insert it in one end of the hose. Pull the hose together over the stick, then pull it off the other end. Continue doing this to push the stick through the hose.

If your hose is clear and the blockage is not on the first hose receptacle, check each receptacle further away or on the levels above to try to determine where the blockage is. Once you determine where the block is, use a residential size plumbing snake or an electricians fish wire to poke the debris in the PVC piping. Turn on the vacuum unit using the manual ON/OFF switch on the unit – or plug the hose into another outlet to turn the vacuum on.. The suction of the vacuum will help pull away the debris as you poke the blockage. If this is not successful, and if you.have a crawl space, it will make access to most of your system very easy. You will find that the PVC pipe should NOT have been glued together, which usually makes for easy disassembly, however runs up interior walls to higher floors will still be inaccessible.

If the blockage is not in the PVC piping, the hose, or in the canister unit, you will need to contact the manufacturer or distributor to have a technician check out your system.

Built in vacuum

Built in vacuums are great. They have many advantages over tradition vacuums, in that they are more powerful, require emptying less often, deliver dust AWAY from the main living areas, and the hose is light and easy to use on stairs and in tight corners.
There are some dis-advantages too. Because they need emptied less often, they often don’t get emptied at all! And because they are more powerful, some people try to suck up everything from pine cones to toys to small family pets. And that long hose? All it takes is an errant piece of stalk from a wisk broom to start clogging everything up. These problems often create another big disadvantage, which is when the vacuum does get blocked up, there is often no easy way to clean out the system.
The first task is to determine if the blockage is in the main vacuum cannister itself, in the PVC piping, or in the hose or attachment. The first thing to check is the main vacuum cannister, usually located in the basement, garage, or utility room. Is the bag full? Empty it to be sure and get the maximum suction. Is the vaccum portion of the unit sealed tight? Are there evident blocks in the PVC pipe that lead into the cannister?
Try turning the vacuum on with the manual switch at the cannister, and then open the closest hose receptacle to the main unit. If there is strong suction, try plugging in the attachment hose. If there is no suction on the hose, then the hose itself is where your blockage can be found.
Usually, by plugging in the hose, and going down the length of the hose, bending and jiggling it, one will dislodge the debris that is caught. Be sure the hose is plugged in, and the vacuum is on, so the debris will be sucked out as you dislodge it. If this does not work, get a broom handle (or similar thick piece of round wood) and insert it in one end of the hose. Pull the hose together over the stick, then pull it off the other end. Continue doing this to push the stick through the hose.
If your hose is clear and the blockage is not on the first hose receptacle, check each receptacle further away or on the levels above to try to detrmine where the blockage is. Once you determine where the block is, use a residential size plumbing snake or an electritions fish wire to poke the debris in the PVC piping. Turn on the vacuum unit using the manual ON/OFF switch on the unit – or plug the hose into another outlet to turn the vacuum on.. The suction of the vacuum will help pull away the debris as you poke the blockage. If this is not successful, and if you.have a crawl space, it will make access to most of your system very easy. You will find that the PVC pipe should NOT have been glued together, which usually makes for easy disassembly, however runs up interior walls to higher floors will still be inaccesible.
If the blockage is not in the PVC piping, the hose, or in the cannister unit, you will need to contact the manufacturer or distributor to have a technician check out your system.

error

Enjoy this website? Please spread the word :)

Instagram
Follow by Email
RSS