...

Preparing for carpet cleaning

Before carpet cleaning, whether you are doing it yourself or if you’ve hired a carpet cleaning company, there are a few steps to get the area prepared:

  • pick up all area rugs and mats
  • remove items from under beds and from inside closets, if the carpets are being cleaned in there
  • pick up all small items off the carpet
  • remove all small items that are on furniture that will be moved
  • move all light furniture from the room
  • open windows for cross ventilation and have fans ready to set up
  • if you are not able to open lots of windows, turn on your heat (furnace) or air conditioner

How to clean your kitchen sink drain

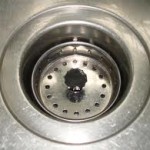
clean kitchen sink drain
Clean your kitchen sink drain

When your kitchen sink drain gets clogged with congealed grease and other food bits, here is  a great non-toxic way to clean it. Pour 1 cup of any kind of salt and 1 cup of baking soda down the drain. Then pour boiling water down the drain. Do not use the drain for a few hours for best cleaning results.

iPad Screen Cleaning

To clean your iPad screen, all you need is a clean, soft,  lint-free cloth, slightly dampened with water. Do not use any chemicals – no window cleaner, no general purpose cleaners, no aerosols, no solvents, no alcohol, no ammonia and no abrasive cleansers. Just water. The iPad screen has a special coating on it which repels the oil left there by your fingertips. Over time, this ability to repel oil diminishes and you will find that you cannot clean the fingerprint marks off your iPad screen as well. If you use any cleaning chemicals on the screen, you can further reduce the screen’s repelling abilities.

cleaning your iPad screen
iPad Screen Cleaning

Completely turn off your iPad. Gently wipe the iPad screen to remove fingerprints. Avoid getting any moisture into any openings on your iPad.

Keeping your iPad in a case will limit the possibilities of the screen getting damaged or scratched. Also, try not to eat or drink near your iPad to avoid spills on your device which may get into the openings and damage your iPad.

How to Clean Your Makeup Brushes

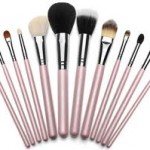
Makeup brushes
How to Clean Makeup Brushes

Keeping your makeup brushes clean will ensure they have a longer lifespan, saving you money in frequent replacement costs. Over time, makeup brushes accumulate dirt and debris, old makeup, oils, bacteria and dead skin cells. Yuck. In addition to being dirty, makeup brushes become scratchy when they are not clean which can irritate your skin.

The frequency of cleaning your brushes will depend how much you use them. You likely should be cleaning your makeup brushes a minimum of once a week. Having extra makeup brushes will allow you to rotate them into use, always having a clean one available.

Here are the steps to cleaning your makeup brushes:

1. Wet the makeup brush hairs under lukewarm running water, being careful to always tilt the brush downward so the water doesn’t run up into the handle, potentially loosening the glue that holds the makeup brush hairs in place.

2. Squirt a very small amount of mild baby shampoo onto your fingers. Mild foaming face wash works well also. (There are specialized cleaning solutions that are marketed as makeup brush cleaners. It is not necessary to use one of these solutions to clean your makeup brushes.) Gently massage the shampoo or soap into the hairs of the makeup brush. Rinse under lukewarm running water, again being careful to tilt the brush downward to avoid water getting in contact with the glue which holds the hairs in place. Keep rinsing until all the shampoo or soap is gone and the water is running clean.

3. Gently squeeze the makeup brush hairs using a clean paper towel or clean towel. Once most of the water has been absorbed, lay the brush on its side on a clean towel to air dry. Reshape the hairs in order to prevent splaying. The drying time will depend on the type and size of makeup brush. Be sure that the brush is completely dry before using it, otherwise makeup will stick to it and you’ll have to clean the makeup brush again before you can use it!


How to Clean Silver Using Toothpaste

Toothpaste can be a very effective cleaner for silver. The baking soda in toothpaste is what does the job. First, choose the right toothpaste. Do not choose gel toothpastes or toothpastes with tartar control or whitening powers. These toothpastes may contain chemicals which could damage the silver.

cleaning silver with toothpaste
Cleaning silver

Wet the silver and dab a small amount of toothpaste on the area you are going to clean. (You may wish to test a small area first so as to see if you should be using toothpaste to clean your silver item.) Use a clean damp cloth and rub the toothpaste around on the silver. Keep rubbing gently until the silver is polished. Rinse the silver with water. As your cloth gets dirty, fold over to get clean areas. Once the silver is all rinsed, dry with a soft clean cloth. Repeat these steps on all the silver you wish to clean. On silver with intricate designs or grooves, you can use a soft toothbrush to work the toothpaste foam into the hard-to-reach areas.

Hard water and soap scum

Hard water and soap scum can be kept at bay by using a sponge or towel soaked with lemon juice. The acidic lemon juice breaks down the dingy grey build up of soap scum/hard water stains.  For build up you can use a commercial product designed for hard water stain removal, it will be a more aggressive acidic cleaner. Or a home remedy is to use cream of tarter and hydrogen peroxide to make a paste allow to dry and buff and rinse clean.

Potassium bitartrate (cream of tarter) can be mixed with an acidic liquid such as lemon juice or white vinegar to make a paste-like cleaning agent for metals such as brass, aluminum or copper, or with water for other cleaning applications such as removing light stains from porcelain.

The much easier solution is to clean the hard water/soap scum frequently so you don’t have a big tough job of scrubbing.

Foggy Mirrors

If your bathroom mirror fogs up after the shower or bath is used, turn your hairdryer on low setting and direct it at the mirror. The blowing air will quickly clear the fog without leaving smears or streaks.


Cleaning Cloth Upholstery

Cloth upholstery

The number one method to keep cloth furniture clean is prevention.  Avoid having dirty or potentially have leather couches in the family room and the nicer cloth furniture in the living room.  That being said here are a few things to do the keep and clean cloth upholstery.

Vacuum regularly using a dusting attachment (the attachment with brushes) this helps loosen dust and dirt making the cleaning and any future spills much easier.  Be sure the vacuum under the cushions as well (you will find loose change), but crumbs always work their way under the cushions.

Uphostery Cleaning
Uphostery Cleaning


If you have a stain which needs removing use a general purpose spot cleaner and clean by following the package instructions, it is always better to tamp or blot stains, rubbing damages fibres and sets stains.  Here is a recipe for a good home made spotter for cloth upholstery.

Mix ¼ cup of laundry soap with warm water if you use a mixer or a whisk you can mix to a froth and use the foam as your spotter.  Apply with a clean cloth or sponge, tamp or blot the stain as the stain breaks down into the foam remove with a kitchen scraper. Rinse by using cool water and blotting with a dry white towel.  Always test a small area on and unseen spot on the upholstery first to be sure there are no adverse affects.

If you have a fresh stain always blot with a clean white towel first to absorb as much of the spill before having to put out the cleaning supplies.  Often immediate blotting with remove much if not all of the spill.

5 Quick Tips for Spring Cleaning

With warmer months just around the corner, spring-cleaning isn’t far away. Whether you want to clear some of the winter clutter or just feel like a change in scenery, spring-cleaning can make it happen. Now is the perfect time to clean out the garage, basement and/or attic. If there are any items that you don’t plan to use, this article will tell you how to get rid of them while making money doing it. As we all know, this can take a lot of work but a few simple tips can make your spring-cleaning experience a breeze.

Tip 1:

If you are storing away your winter clothes, consider using large plastic storage containers that feature snap-on lids. These can be found in the house wares department at most stores and are very inexpensive. Storage containers are very important to keeping your clothes dust and discoloration free, which may otherwise be a problem if they are left hanging in the closet from one season to the next.

Tip 2:

When packing your clothes, roll them instead of folding. This not only eliminates creases and wrinkles, but also saves a lot of space. You will be able to pack a lot more clothes with this technique.

Tip 3:

Label your clothing containers as “Spring”, “Fall” and “Winter”. This will help you to easily locate your wardrobe inside the closet.

If you have any clothing that you don’t plan to wear or simply have outgrown, consider donating them to a local goodwill or other nonprofit organization. Rather than tossing them out, your clothes can provide revenue for a worthy cause and help the less fortunate to be able to afford clothing that would otherwise be unattainable.

Tip 4:

If you are looking to clear out some knick-knacks or perhaps even some Holiday decorations in order to make room for new ones, consider a trip to the local flea market. Everyone is looking for a bargain and they just may be looking for something that you no longer wish to own. A setup fee is usually required which, depending on the location, can be $10.00 to 20.00 per day. Otherwise, you can always sell items at internet auction sites, including Yahoo and eBay.

Tip 5:

Break down your chore list so that the overall task will be easier.  For the bigger outside jobs like pressure washing driveways and decks etc. hire a company to make the over job of spring cleaning easy.  Then break down the inside room by room and break it down over time to make it easier.

Cleaning Schedules

Many people don’t attach much time to planning or setting up a cleaning schedule for themselves.  Here are some advantages to setting up a regular cleaning schedule for yourself or your family.

-          You will always keep up with your cleaning so you won’t be overwhelmed with cleaning tasks.

-          Your home will be an overall healthier environment.

-          You will have extra time for larger tasks if you always keep up with the basics.

-          You don’t have to worry about dusty shelves if you see them, because you know it will be taken care on the scheduled time etc.

-          Cleaning is very easy if it is done often, the dirt never builds up to the point where it is difficult to clean. Just be sure to have all the needed janitorial supplies on hand!

-          Most surfaces and or objects last longer if they are clean.

Cleaning Schedules
Cleaning Schedules


error

Enjoy this website? Please spread the word :)

Instagram
Follow by Email
RSS