...

Leather Care for your Car Interior

Leather Care for your Car Interior by David Bynon Copyright (c), 2000, Autopia Car Care — All Rights Reserved

There are two important parts to caring for your leather interior: cleaning and conditioning. Since your leather interior is the most delicate surface of your car, it is necessary to clean and condition regularly in order to preserve it, protect it, and keep it smelling new. Whether you’re cleaning or conditioning, we recommend that you take one section at a time. This means, when you have applied your cleaner or conditioner to one area, fully wipe down that area then proceed to the next, and so on. This process ensures that you cover all areas thoroughly. Work on an area no larger than 2-3 square feet at a time.

HOW DO I CLEAN MY LEATHER?

Apply the leather cleaner of your choice one section at a time and work the solution into a nice lather. If your leather is heavily soiled, use an upholstery (interior detailing) brush. When finished be sure to remove all soap from the surface with a damp towel. Rinse and wipe several times, then dry the leather with a fresh, dry towel. By the way, water will not hurt your leather. Most leather is actually made (tanned) in water.

HOW OFTEN SHOULD I CLEAN MY LEATHER?

If you have a dark colored leather interior, we recommend 2-3 times a year. Light colored leather will need cleaning more often, even as much as every other month, depending on how easily the dirt is revealed. In between cleaning your leather (every other time you wash your car), use a clean damp towel to wipe down the surface completely. This removes the dust and light dirt so it won’t have a chance to work into your leather. There are two cleaning factors that cause leather to wear. The first is dirt and the second is oil from your skin. The oil from your skin is actually the most damaging to your leather. This is particularly true if you wear shorts or a tank top, and have recently applied lotion or sun screen to your skin. Take this into consideration, also, in determining your cleaning schedule.

HOW DO I CONDITION MY LEATHER?

Apply the leather conditioner of your choice on one section at a time using a soft a foam wax applicator. Work the conditioner in thoroughly. Allow the conditioner to sit (soak in) for a few minutes, then buff off the excess with a dry terry cloth towel. It’s important to buff off the excess. If you allow the excess to stay, your seats will be slippery. After a few minutes of soak time, your leather has taken in all the moisture it can. The remainder will simply evaporate, leaving that milky cloud on the inside of your windows.

WHY IS CONDITIONING MY LEATHER SO IMPORTANT?

Leather requires replacement of natural oils or it will dry out and crack. Conditioning helps to restore these natural oils and keeps the leather soft and supple. You will also find, particularly with the Zymol and Pinnacle leather conditioners, that the smell of the leather will be enhanced. Remember how your car smelled when it was new?

HOW OFTEN SHOULD I CONDITION MY LEATHER?

We recommend once every 30-45 days depending on the climate condition in which you live. If you live in a climate that is humid, you won’t have to condition as often as someone who lives in a dryer climate. A cold, dry winter in the East can deplete your leather of it’s moisture causing it to dry and crack just like a hot dry summer in the West.

WHAT PRODUCTS SHOULD I USE TO CLEAN MY LEATHER?

We recommend Lexol Spray Leather Cleaner and Pinnacle Leather & Vinyl Cleaner. Both work very well. Both are easy to use, and easy to rinse.

WHAT PRODUCTS SHOULD I USE TO CONDITION MY LEATHER?

We recommend Lexol Spray Leather Conditioner, Pinnacle Leather Conditioner, Eagle One, and Hyde Food.

David Bynon is a Howtocleananything.com forum expert. This and other car care information can be found at Autopia Car Care

Cascade Complete

cascade This section of our website offers a review of currently available products. We will offer our actual experience and the success or failure of the product in living up to the manufacturers claims.

This is the first installment of an ongoing series, where our ‘test’ families will use a product to assess its performance under real home conditions. After a thorough evaluation, we will write a brief review of the products, and offer our opinion to whether the product meets the manufacturers’ claims.

We had four test families evaluating this product. All of the families had children, and three of the families have children under 2 years old. We aren’t sure exactly how this impacts our test, but from our experience we have found that young children can create exceptional messes from seemingly harmless household items. So we figured that this must translate to dishes as well.

The dishwashers being used at these households include a Maytag, a Hot Point, a Meile, and an General Electric. The product tested was Cascade Complete powder, provided by the manufacturer, Proctor and Gamble. This is a new product that claims “From the table to clean with no in-between”. The packaging tells us that the Clean Dissolve Formula actually dissolves food particles so they won’t be transferred onto other dishes or trapped in your dishwasher. Since the food is dissolved, they claim you don’t need to pre-wash your dishes before putting them in the dishwasher. Great idea in theory, and for the most part it works in real life, too.

In the month we ran our test, our test families did just over 100 loads of dishes, and the items that came out dirty could be counted on one hand. For the most part we were trying to make this product fail – leaving all kinds of disgusting residue on the dishes we were going to wash. We took off the chicken bones, and meat gristle, and piles of food left by one incredibly picky four year old, but we did not rinse the dishes, even the ones that had sit out overnight.

Our failures came mostly from cooked on food. A dish used to make scrambled eggs in the microwave, a pot of dried up oatmeal left out overnight, and a casserole dish with cheese burnt onto the edges were the most significant failures. As well a wooden spoon with a cream based pasta sauce and some noodles, again left out overnight, did not come clean.

Please don’t think we all leave our dishes out overnight, but it happens, mostly when husbands are left in charge of the clean up.

Given the number of dishes we washed, there was less than 1% that needed re-washed. In our opinion this product met it’s manufacturers claims. It should be noted that the packaging recommends filling both soap compartments, which 2 families did each time. One family only added to the pre-wash compartment if the dishes were badly soiled, and the last family only added the soap to the one primary compartment.

The families said without a doubt they will continue to use the product ……until their test supply runs out after which, two families said they would definitely continue to purchase the product and two families said they were likely to continue purchasing the product.

One of our test families wrote us recently with their experience once their test supply of Cascade Complete ran out. Their letter was as follows:

“….only after we ran out, we realized that this product was different from other dishwasher powder. We had gone back to the bulk mega pack soap and after the first load we found THREE dishes with caked on food. This after we had only had three or four dishes with caked on residue from ALL of the loads we did during the two months we used Cascade Complete!! We put the dishes back, and picked up a box of Cascade Complete when we got our groceries that afternoon, and we re-washed the dishes with our load that night. You know, it worked? Even though the food was baked on through the sani wash of the first load, it came clean this time. Maybe we were spoiled by not having to pre-rinse the dishes for 8 weeks, but our old regular brand just does not compare now that we have really used them both on the same problem dishes. We are converts….Thanks”

via e-mail:

I am very pleased with Cascade Complete. My results were similar to those of the test families, but I used the GEL formula. The few failures were on my own “test products” that I let dry overnight – oatmeal, a Corning casserole dish that had been used for a cream of chicken flavored dish, and the dish used to microwave scrambled eggs. All other testing was successful. I will be continuing to use this product.

Linda R.

Elkview,WV

via e-mail

We received a sample of this product with our new dishwasher. After having tried it, I went out and bought some more. Not only does it do a wonderful job of cleaning dishes without having to pre-wash them, but my daughters are much more willing to do the dishes now that they don’t have to spend so much time “cleaning” the dishes before loading into the dishwasher. This product definitely gets an A+ from our family.

Paula B.

via e-mail

After reading your we tried this product and got uniformly excellent results. We then tried others and only one product, Electrasol Dual Action, was any better. Cascade Complete almost never failed and Electrasol Dual Action never failed in our hard water. Electrasol costs somewhat less than Cascade.

Kent S.

via e-mail

I thought maybe my dishwasher was not working completely; or maybe that dishwashers just wasn’t what they are advertised to do. After I started using Cascade Complete, ALL my dishes are clean, and I don’t have to use Jet Dry for water Spots.

Denise T.

Waste Paint Hardener

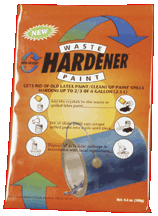
wph-bag This product is amazing! During spring clean-up we all look at those half empty gallons of paint in the basement, storage shed, or garage. Some years we move them around to sweep under them, other years we will shake them to see if they have gone solid yet.

The paint you used in the family room 2 paint jobs ago has little use, but because of the environmental hazards, we don’t send liquid paint to the landfill.

There are a couple of ways to get rid of old paint. You can donate it to charity. At least that is one of the methods found in on-line searches. I suppose charties might use some, but I can also imagine some poor volunteer in the church basement re-arranging half used paint cans each spring.

The other method is incineration. Effectively burning the paint, cans and all, collected during special drives or at certain recycling centers.

The final method is to use the paint on an old piece of drywall or plywood until it is all gone.

Now there is a new, far more effective method for getting rid of old paint. This product called “Waste Paint Hardener” is made by a company called Biowash. They specializes in environmentally friendly paint removal solutions. This is an off shoot of their cutting edge technology.

Add the crystals to your paint, stir for a couple minutes, and in next to no time (20 minutes for our test) the paint is a solid mass. We tested the product in a glass mixing bowl, so we could observe and record the results. After it had hardened, one of the testers turned the bowl completely upside down, and the paint stayed stuck inside in one big hard blob!

This leaves the old paint in a state that is accepted by almost all landfills. Of course you should leave the lid off so your garbage man can see it is hardened, but as far as a quick, economical, and environmentally sound disposal method for paint – this is THE best solution we have ever seen.

This product is also excellent for CLEANING up paint, which is how we stumbled across it. Just sprinkle the crystals onto spilled paint, and in minutes you can just sweep it up and throw it away. It doesn’t get much easier.

The product is currently available at some paint stores, and will be readily found in most large Home Centers by this fall. If your paint store does not carry the product – ask them to stock it – they will thank you!

Abrasive Cleaners

General Information :
Abrasive cleaners generally use some kind grit to boost their cleaning ability, along with detergents, acids, alkalis and other compounds. Some are in powder form while others suspend the abrasive in liquid. The quartz or silica that constitutes the grit will easily scratch and/or damage softer surfaces such as laminate, fiberglass, stainless steel, etc. Even on very hard surfaces such as porcelain, use caution. Over time abrasives will dull and scratch.

However, abrasive colon cleaners will often work where others fail. Remember to rinse well after use to remove any residue.

Liquid abrasive cleaners are generally more expensive but are more convenient to use.

Candle Wax Stains from Linoleum Floors

“How can I remove candle wax stain from a linoleum floor ? “

Try these techniques :

I would hope that you have first tried to remove as much of the residual wax as possible with a scraper or putty knife. If a stain remains after you have scrapped the area, it’s usually an indication that the offending material has penetrated into the residual wax finish. Worse yet, there is a chance that the stain has traveled through into floor covering or linoleum.

There are cases where I have found problems dealing with issues such as this. Where the floor material is battleship linoleum, and has very little sealer or wax on the area where the stain occurred. Often the stain will travel so far into the linoleum it leaches down to the sub floor and becomes permanent.

The only way I can see you removing the stain at this point, is to thoroughly strip the floor with a good quality wax stripper. Your best chance of finding a high quality product is at a janitorial supply, as the products they sell are used by professionals. You can often get support in resolving your cleaning problems, as well as directions on the proper use of product. It’s important to follow the directions on the product you choose, and to ensure that the area is immersed with the stripping solution and allowed time to dissolve the offending stain.

Some agitation with a scrub brush, synthetic pad or very fine steel wool is usually required along with the stripping solution to penetrate the wax layers and build up. There are also products available that require very little agitation. Be careful not to scrub too vigorously over the stained area, as you can wear away the top layer or factory finish of the flooring material. This will leave you with an area that is off colored from the remainder of the floor, and be just as unsightly as the original stain.

How to clean Chandeliers

General Information:
To clean chandeliers, there is an easy way and a not so easy way. The not so easy way may be necessary if there is a heavy accumulation of grime, or if the chandelier is located near a kitchen where grease might soil the surface. Both methods require you safely be able to access the fixture. Many newer chandeliers, and commercial units are installed on a winch that can raise or lower the unit with the turn of a switch.

Tools & Technique
The easy way requires the power to the unit to be off. It is a good idea to turn off the breaker to be certain.
Using small plastic bags, cover each light fixture and secure with elastic bands.
Mix a spray of warm water and rubbing alcohol in a 10-1 ratio.
Place a heavy towel under the chandelier, and spray the mixture onto every crystal.
Allow the fixture to drip dry, there shouldn’t be any streaks and the crystals should sparkle like new.
Allow the whole unit to dry for 24 hours before restoring power.

The hard way is similar, only harder. Much harder.
Remove 10 or 12 crystals at a time, any more than this and you run the real risk of having a much different looking chandelier by the time you are finished.
Dip each crystal individually into a bucket of the same mixture. For greasy films, add a few drops of dish washing soap.
Rinse each crystal individually. Then lay out each on a terry towel.
Polish each crystal and return it to its place on the chandelier.
These crystals will break, and chip each other so dip and rinse only one at a time, and try using a clear bucket so you can see what you are doing.
This is very labor intensive, and once you start you are committed to finish because the dirty crystals look like hazy chunks of plastic next to the clean and polished ones.

Spring Air Conditioners

This should be done every month while the unit is being used regularly:

Air conditioners may cool your body, but if you’re not careful they can burn your pocketbook. To make sure your window unit is running at its most efficient, unplug it and open it up for inspection. Immediately inside the air conditioner’s grille, you’ll find a filter, which should be cleaned regularly with soap and water, or replaced if it’s ripped or otherwise damaged. Just behind the filter lie the evaporator fins, which frequently get layered with dust; simply vacuum them off. Now, put the unit back together and go back to “thinking cool thoughts,” legendary pitcher/pundit Satchel Paige’s cure for hot weather.

Courtesy of True Value Hardware

If the unit is very dirty, or has not been serviced for several seasons, it may require a more thorough cleaning.

Remove it from wall sleeve or if smaller unit remove complete a/c unit.If it does not have a sleeve remove all screws to remove outer casing.

Use good duct tape to seal all switches on front of unit. Use plastic to cover fan motor and duct tape plastic into place. Spray evaporator coil and condenser coil with garden hose, and let water drain for a couple minutes. Next spray oven general purpose cleaner on evaporation coil and condenser coil. Let it set for 20 minutes and then rinse it clean. It will be necessary to do the same with the evaporator blower wheel. Keep in mind that the air flow on the condenser may be from blades through the back of the unit, instead of through the condenser towards compressor.

If the fan motor has oil ports, remove the caps after cleaning and place 10 drops of oil into opening, then re-install caps back into position. It is best to blow out all components with compressed air afterwards. Let unit sit for 24 hours to dry before using.

Air Conditioning and Cooling Info for DoItYourselfers

It might surprise you to know that buying a bigger room air conditioning unit won’t necessarily make you feel more comfortable during the hot summer months. In fact, a room air conditioner that’s too big for the area it is supposed to cool will perform less efficiently and less effectively than a smaller, properly sized unit.

This is because room units work better if they run for relatively long periods of time than if they are continually, switching off and on. Longer run times allow air conditioners to maintain a more constant room temperature. Running longer also allows them to remove a larger amount of moisture from the air, which

lowers humidity and, more importantly, makes you feel more comfortable.

Sizing is equally important for central air-conditioning systems, which need to be sized by professionals. If you have a central air system in your home, set the fan to shut off at the same time as the cooling unit (compressor). In other words, don’t use the system’s central fan to provide circulation, but instead use circulating fans in individual rooms.

Cooling Tips

Whole-house fans help cool your home by pulling cool air through the house and exhausting warm air through the attic. They are effective when operated at night and when the outside air is cooler than the inside.

Set your thermostat as high as comfortably possible in the summer. The less difference between the indoor and outdoor temperatures, the lower your overall cooling bill will be. Don’t set your thermostat at a colder setting than normal when you turn on your air conditioner. It will not cool your home any faster and could result in excessive cooling and, therefore, unnecessary expense.

Set the fan speed on high except in very humid weather. When it’s humid, set the fan speed on low. You’ll get better cooling, and slower air movement through the cooling equipment allows it to remove more moisture from the air, resulting in greater comfort.

Consider using an interior fan in conjunction with your window air conditioner to spread the cooled air more effectively through your home without greatly increasing your power use.

Don’t place lamps or TV sets near your air-conditioning thermostat. The thermostat senses heat from these appliances, which can cause the air conditioner to run longer than necessary.

Plant trees or shrubs to shade air-conditioning units but not to block the airflow. A unit operating in the shade uses as much as 10% less electricity than the same one operating in the sun.

Tips for Lowering Your Central Air Conditioner’s Energy Usage

Set your thermostat at 78 F or higher. Each degree setting below 78 F will increase energy consumption by approximately 8%.

Be careful, however, that if you’re A/C is oversized the diminished run-time from raising the thermostat setting may result in too-high indoor humidity in some locations.

Use bath and kitchen fans sparingly when the air conditioner is operating to avoid pulling warm, moist air into your home. Inspect and clean both the indoor and outdoor coils.

he indoor coil in your air conditioner acts as a magnet for dust because it is constantly wetted during the cooling season. Dirt build-up on the indoor coil is the single most common cause of poor efficiency.

The outdoor coil must also be checked periodically for dirt build-up and cleaned if necessary.

Check the refrigerant charge. The circulating fluid in your air conditioner is a special refrigerant gas that is put in when the system is installed. If the system is overcharged or undercharged with refrigerant, it will not work properly. You will need a service contractor to check the fluid and adjust it appropriately.

Reduce the cooling load by using cost-effective conservation measures. For example, effectively shade east and west windows. When possible, delay heat-generating activities, such as cooking and dishwashing, until evening on hot days.

Over most of the cooling season, keep the house closed tight during the day. Don’t let in unwanted heat and humidity. Ventilate at night either naturally or with fans.

Why Buy An Energy Efficient Room Air Conditioner?

High-efficiency room air conditioners save money on your utility bills. High-efficiency room air conditioners result in fewer environmentally harmful emissions. An average air conditioned home consumes more than 2000 kilowatt-hours of electricity per year for cooling, causing about 3,500 pounds of carbon dioxide and 31 pounds of sulfur dioxide to be emitted by the power plant.

At average electricity prices, that costs about $150.

A high-efficiency A/C unit can reduce energy consumption (and environmental emissions) by 20% to 50%. The most efficient air conditioners on the market are up to 70% more efficient than the current average room air conditioner.

Writing on the walls…

Are your children budding artists?

If your children have decided to use the bedroom walls to create their latest crayon masterpieces, you’ll get excellent results by dipping a damp rag into baking soda and then using that mixture to scrub it off.  Its the home remedy that my Grandma used.

Although a quicker way is to use a Magic Eraser, which, as a professional cleaner for the past 20 years, in my opinion is one the best cleaning products I have seen for quick cleanups. WD-40 does work very well at removing crayon marks, however you have to clean off the oily residue after with soapy water.

Built in vacuum plugged? Make it suck again.

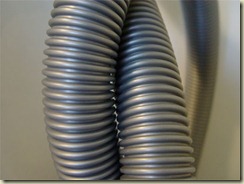
Built in vacuums are great. They have many advantages over tradition vacuums, in that they are more powerful, require emptying less often, deliver dust AWAY from the main living areas, and the hose is light and easy to use on stairs and in tight corners.

There are some dis-advantages too. Because they need emptying less frequently, they often don’t get emptied at all! And because they are more powerful, some people try to suck up everything from pine cones to toys to small family pets. And that long hose? All it takes is an errant piece of stalk from a Wisk broom to start clogging everything up. These problems often create another big disadvantage, which is when the vacuum does get blocked up, there is often no easy way to clean out the system.

vacuumThe first task is to determine if the blockage is in the main vacuum canister itself, in the PVC piping, or in the hose or attachment. The first thing to check is the main vacuum canister, usually located in the basement, garage, or utility room. Is the bag full? Empty it to be sure and get the maximum suction. Is the vacuum portion of the unit sealed tight? Are there evident blocks in the PVC pipe that lead into the canister?

Try turning the vacuum on with the manual switch at the canister, and then open the closest hose receptacle to the main unit. If there is strong suction, try plugging in the attachment hose. If there is no suction on the hose, then the hose itself is where your blockage can be found.

Usually, by plugging in the hose, and going down the length of the hose, bending and jiggling it, one will dislodge the debris that is caught. Be sure the hose is plugged in, and the vacuum is on, so the debris will be sucked out as you dislodge it. If this does not work, get a broom handle (or similar thick piece of round wood) and insert it in one end of the hose. Pull the hose together over the stick, then pull it off the other end. Continue doing this to push the stick through the hose.

If your hose is clear and the blockage is not on the first hose receptacle, check each receptacle further away or on the levels above to try to determine where the blockage is. Once you determine where the block is, use a residential size plumbing snake or an electricians fish wire to poke the debris in the PVC piping. Turn on the vacuum unit using the manual ON/OFF switch on the unit – or plug the hose into another outlet to turn the vacuum on.. The suction of the vacuum will help pull away the debris as you poke the blockage. If this is not successful, and if you.have a crawl space, it will make access to most of your system very easy. You will find that the PVC pipe should NOT have been glued together, which usually makes for easy disassembly, however runs up interior walls to higher floors will still be inaccessible.

If the blockage is not in the PVC piping, the hose, or in the canister unit, you will need to contact the manufacturer or distributor to have a technician check out your system.

Care and treatment of your trusty old Baseball glove

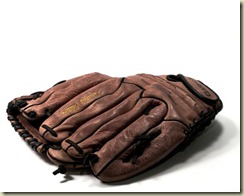
baseballglove Now that summer is over many of you will be putting away your baseball & softball gloves until “spring training” next spring. Here is some advice on how to keep that glove in top shape and ready for next season Many types of treatments and care have been suggested over the years for baseball and softball gloves. Be sure to find the method that works or you may be looking at the newest selection of batting gloves before next season.

Some of these are safe and some, unfortunately, may damage glove leather. We recommended that one of the best and safest leather cleaners and conditioners is untreated petroleum jelly. Professional glove repairmen and leather specialists agree that this is one of the best applications, both for cleaning and conditioning glove leather.

During the break-in period, treat your new glove with a light application, working it into the leather. This will reduce the stiffness of the new leather and facilitate a faster and more comfortable breaking in procedure. Also, at the end of the season, take a generous amount of petroleum jelly and thoroughly cover the outside and inside of the glove.

Don’t ignore the laces or hard to-get-to areas, both inside and outside the glove. Then take a clean rag and wipe off excess to remove grit and grime. This will also remove and help neutralize much of the salt and acid buildup inside the glove caused by perspiration, a chief problem to the leather lining, usually made of softer leather. We do not recommend neat’s-foot oil, linseed oil or silicon-type spray as these tend to close the pores of the leather, causing it to dry, harden, and become heavy over an extended period of time and through repeated use. Petroleum jelly keeps the pores open and in effect, keeps the leather “alive” while also providing a softening condition.

Basically remember that leather is skin and leather experts tell us not to treat glove leather any differently than you would your own skin. Prolonged harsh temperatures, excessive water soaking (especially use of hot water), abrasives, the salt and acids produced from perspiration and excessive dryness all or individually can be harmful to the glove leather.

Also, continued exposure to sunlight may result in fading of the leather color. Be careful about sealing gloves in plastic bags for over 12 months. We hope this gives all you players a good idea on how to care for your glove until the next time you hear those words so near and dear to our hearts – PLAY BALL!!

(Special acknowledgement to the folks at Nokona for this valuable information)

error

Enjoy this website? Please spread the word :)

Instagram
Follow by Email
RSS