...

Textured Ceilings

Popcorn ceilings or textured ceilings are very common as they help to hide imperfections in the ceiling drywall, which otherwise can be very evident.

Dust and small spider webs tend to get caught on these rough surfaces. Although they may not be entirely evident at a glance, even in the cleanest homes, most ceilings can accumulate noticeable dust after as little as a year.

The easiest way to clean this type of ceiling is using a vacuum with a soft brush attachment. Be very gentle so as not to knock off the texturing.  Follow a methodical pattern to be certain you cover the entire surface of the ceiling.  Even if you are very careful, don’t be alarmed if some texturing falls off.

If the ceiling is stained from a water leak, or pop, champagne or food being sprayed, there is no way to clean it, however there are products that allow you to spot spray paint an area with a matte off white color which unfortunately will never be an exact match, but it will be close for an aged ceiling.

Carpet Stains Removal:How to Remove Egg stains from the carpet

To remove egg stains from the carpet act quickly! When egg dries it can become semi-permenant, so acting fast will help increase your odds of success.

  • First scrape up as much of the egg as possible, and use a spatula or the pancake flipper to scrape off as much of the egg as possible.
  • Mix a solution of warm water, a small amount of dish detergent, and 2 tablespoons of white vinegar.
  • Apply half of this solution to the stained area, and with paper towel or a clean dry rag, blot up the water solution until the area is dried.
  • Repeat the process with half the remaining vinegar solution, and again blot up.
  • Repeat one last time if required, to remove the last of the egg residue from the carpet.

This should remove the vast majority of the egg residue, and prevent a permenant hardened stain in your carpet.  It would be wise to perform a full carpet extraction as soon as possible to ensure all the residue has been removed – but use the vinegar solution before you call the carpet stain cleaners or head to the grocery store to rent an extractor or it may be to late to remove the stain!

Window and Door Screens

This work is often done in the spring before bug season, or at the end of summer if you store your screens for the winter season.  Try to pick a warm day with a bit of a breeze to facilitate drying.

The  proper way to clean screens is to remove them from the window frames or doors.  If you are planning on cleaning multiple screens at one time, (and it is best to considering the set up!) it is wise to number both the screen and the window with a permanent marker before starting.

Construct a simple wooden 2X4 frame on a flat smooth deck or patio big enough to accommodate your largest screen.  Cover the frame with a heavy plastic or tarp and fill it with water and a few teaspoons of dish washing soap.

Lay one screen at a time into the frame, and gently brush it with a soft brush, or a synthetic broom.  Brush both directions and along the screen frame before flipping the screen over and repeating the procedure on the other side.

Lift the screen out of the frame and allow the cleaning solution to drain off before rinsing the screen off with a garden hose sprayer on a gentle setting.  Give the screen a quick shake and set it against a fence or wall in the sun or breeze to permit drying.

If you are storing your screens, it is best to protect them with a piece of cardboard or plywood and cover them with an old bed sheet or plastic tarp to keep them from getting dusty before the spring.

Before replacing your screen, using a bucket and sponge or clean rag, wipe the frame of the window to remove any accumulated dust.

In the event you cannot remove your screen, you can vacuum with a soft brush attachment, which will remove the bulk of accumulated dust.  Using a plant mister, spray the screen with a water/dish soap solution, and using a dry clean cloth, wipe off the screen.  If possible clean the exterior, then the interior.

Sharpie marker out of Ethan Allen upholstered couch…

Here is the answer to a  question I received recently…
Step one…no sharpies near the fancy couch!
Sharpie marks on the Ethan Allen ouch that’s not good, sharpie and markers are rarely cleaned using a water based cleaner like spot cleaners etc.  They are normally cleaned using some kind of solvent, however solvents are harsh and will remove all colors including the stain and or damage many fabrics.
The best solvent for this application (for cleaning fabrics etc) is likely a  dry cleaning solvent (which can be purchased at any janitorial supply store).  Even so you will want to test an inconspicuous spot first and always tamp or blot the stains with a white cleaning towel no scrubbing allowed. the idea is you want to transfer the stain onto the absorbent cleaning towel with the help of your cleaning agent.
However if the couch is expensive you are likely better off getting a professional carpet/upholstery cleaner.  Be sure that they are iicrc certified (www.iicrc.org)  they will have a multiple options and lots experience with spot cleaning all types of couches etc.

Cleaning out a garburator

Garburators are under appreciated and generally unnoticed appliances that is until they stop working, start to smell funny or sound like a blender filled with marbles and nails.

Garburators are essentially a hefty motor attached to an impeller that pulverizes food until it is small enough to pass into the drain pipe as you run water into the unit.

These units are very reliable, but many older units tend to have problems, especially when they are not used for extended periods.  Garburators mix water and electricity which is typically not an ideal combination.

The most common problem is that the unit just stops working when you press the switch, and this is often realized after you have dumped the most disgusting mix of old food scraps into the unit, and they start to smell because the pieces are too large to wash into the waste drain pipe.

First things first press the wall or sink top button and listen carefully.  If it is working you will definitely hear it turn on, or you may hear a very soft humming or buzzing noise from beneath the sink, or you will hear absolute silence.

If you hear nothing at all, grab a flashlight and look at the bottom or side of the giant motor hanging beneath your sink.  There will be a small (usually red) button, which is an internal safety reset.  Press this button in (you may need the end of a pencil or your pinky if it is inset into a small indent).  If this button has popped out, there is a problem with your garborator, but if the button is depressed already, try to identify the breaker on the main electrical panel, and see if it is switched on.  If the breaker is tripped, reset it by turning it off, then turning it back on.  Test the garborator again. If it works, fantastic, otherwise you may hear the humming noise, (perhaps just briefly) before the breaker or safety reset trips off again.

If you hear the humming, even if just briefly before the breaker shuts off, likely the unit is seized. This sounds like bad news, but frequently it is simply because the unit hasn’t been used for months, or years.

Turn off the breaker, ensure that the switch is in the off position, and proceed to remove the rubber gasket in the mouth of the unit. With a flashlight, you should be able to see clearly into the unit (after you have scooped out all the disgusting food scraps mentioned at the beginning).  With most the food removed, you can usually wash away the small scraps, unless the drain is plugged, in which case you need to remove the waste water in the unit as well.  There are special suction tools for this, but in a pinch a turkey baster, or a car wash sponge will allow you to soak up enough water to see the impeller.

The impeller should turn freely.  If it doesn’t turn (try the end of a wooden spoon) easily, this is what is causing the reset switch or breaker to trip.  Food, dishwashing goo, rust and other assorted stuff can seize up the impeller, which causes the reset switch or breaker to trip, resulting in the clogged and/or smelly garborator.

Sometimes a wooden spoon with a long handle is enough to spin the impeller loose but often a small crowbar or large screwdriver is required.  Be certain the unit is turned off at the breaker when trying to free the impeller!  If you aren’t comfortable or absolutely certain you have disabled power to the unit, call a plumber!

Once the impeller spins freely, replace the rubber gasket or garborator sink stopper, turn on the breaker, double check the safety reset switch and turn the unit on.  If you had the impeller spinning before, the unit should roar to life.

If it is smelling sour, cut up a lemon and dump it into the unit to help clean off whatever it is that is causing the odor.  In fact, once a month or so, it doesn’t hurt to cycle the unit, to be sure it doesn’t seize up again.

If this does work, you have just spent 20 minutes saving several hundred dollars, if this doesn’t correct the problems you are experiencing, likely you require a new unit.  Good luck!

Stinky Fridge/Freezer

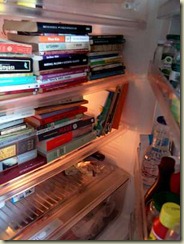
fridgebooksI have a refridgerator/freezer that is kept outside in a shed for summer use. My husband unfortunately (understatement) did not clean it out but unplugged it (yes he is still alive but barely LOL). I cleaned it out (Hepa mask, gloves and all)using Clorox cleanup they are both clean but the smell is still noticeable. We placed 2 boxes of baking soda in the fridge and in the freezer but the smell is still there
PLEASE HELP

Eeeewwwwww….Yech!

You are obviously a very compassionate woman for sparing his life.

Your initial instinct was correct. For a fridge that has maybe a day or two of odors, this will work, however since the plastic has been absorbing this fragrant  odor for several months, you have to be more aggressive.

The clean up you did is the first step, although it would have seemed more appropriate if your husband were forced to do it sans the respirator and gloves.

Try a shallow pan of active charcoal, which you can find at your local pet store or aquarium supplier. Let this sit for a few days and see if it helps enough to make it tolerable. Another great hint is to fill a shallow pan with fresh ground up coffee. This smell is more powerful, and it too will be absorbed by the plastic. This is more masking the problem than removing the odors, but it is likely better to smell coffee, than, well whatever it smelled like. (And I thank you for not describing that part to me)

If this still does not work to your satisfaction, we have one final idea. Empty the fridge and be sure it is ON, crumple up some old newspaper, and mist the paper with water. Stuff the fridge full of these big balls until it is entirely filled. Replace the old newspaper, with new, fresh moistened newspaper balls every other day. Try using the sports section before your husband reads it, to remind him that it was his mistake. Repeat this four or five times (yes this will take a week to 10 days!), at which time it should be OK to breath when you open the door. It is possible the fridge will require defrosting once you have done this, if all the moisture has migrated up the freezer.

Even when you are done this, the baking soda, and/or ground coffee won’t hurt, although the coffee may flavor unsealed food as well.

Failing all of the above, put your husband in the fridge, dump them in a landfill, and go get yourself a new model of each.

Nail Polish remover

Nail Polish remover normally contains the solvent acetone or amyl acetate. It is useful in removing nail polish (obviously…) from your finger nails and also fabric. Use a blotting action and test for color fastness. It will damage certain fabrics, but is usually safe on bedsheets etc. It is also effective at removing glues including crazy glue I don’t know about you but I usually stick my fingers together in addition to the object I am trying to repair, no matter how careful I am when using crazy glue.

Electrical Contacts & Terminals

Description:
Dirt and corrosion can reduce the electrical current in a circuit, and is the cause of many problems with small appliances.

Tools & Chemicals:
Sandpaper, a file, an emery board, or steel wool are all effective tools to clean contacts and terminals. Solvents, compressed air, and some spray on lubricants are effective ways to remove debris and prevent subsequent fouling.

Technique:
Be sure the appliance is unplugged before proceeding with any electrical work. Shock or death can result from working on live circuits. Depending on the surface, use which ever tool seems most appropriate. The objective is to remove the dirt or corrosion to allow the electrical current to flow uninhibited. Once the offending buildup is removed, a touch of spray lubricant or even petroleum jelly can prevent subsequent buildups.

How to clean the kichen sink

The vast majority of homes have standard, very durable stainless steel sinks.  There is a reason for this – they are inexpensive, stand up to years of use (and abuse), and can be cleaned up to look almost as good as new.

The most common staining with stainless steel sinks is the brown residue left when coffee is poured out, but not rinsed away. This discolouration can be a subtle yellow to a dark brown, especially if the sink is located at the office near the coffee station.

There are several solutions, the quickest is a cream cleanser and an SOS or abrasive scrubbing pad.  If you don’t feel like scrubbing, a mild acid such as CLR will typically remove these and any hard water deposits.  Just plug the sink and pour in at full concentration and leave overnight!

If the sink is very dull, or badly scratched you can polish it with fine steel wool, and metal polished typically found in the automotive isle for restoring the finish on aluminum wheels.

For acrylic, or solid surface materials check the underside of the sink for the manufacturers name and consult their web site for proper care instructions.  Usually to remove minor staining an acrylic safe cleaner and/or melamine sponge (such as a Magic Eraser) will remove surface staining.

The best preventative cleaning is to rinse the sink after each use, especially after discarding coffee, tea, colas and tomato based foods.

Blood on Bedding Sheets

Easy care is one of the primary reasons people choose cotton bedding. Removing stains from sheets, blankets, pillowcase and other bedding is easy thanks to the fabrics inherent qualities.
Blood is one stain that most people struggle to remove.  In many instances, usable cotton bedding is discarded and considered ruined once blood has leaked on to it.  Additional money is then spent on replacing the seemingly ruined items.
In other cases, much money is spent taking cotton bedding to the dry cleaners as a stain removal solution. In both cases, the result is spending extra money on new bedding that may be unnecessary.

Blood can easily be removed from most washable cotton bedding by using very ordinary household cleaning products.  As soon as a stain is noticed the sheets should be laundered in cold water.  If the stain has dried, pretreat the area with hydrogen peroxide.  It should bubble up and loosen the stain before you wash it as usual.  Another, even more common solution is regular shampoo. Any shampoo will usually do the trick, be it your favorite brand or a less expensive store brand.
For optimal stain removal, it’™s best to remove the stain as soon as possible, preferably upon occurrence.  Albeit, this is not always feasible. But, it is helpful to try to remove blood from cotton bedding before it dries and is ‘set’ to ensure complete elimination. In any case, using shampoo will usually eliminate hours-old stains in minutes.  For stains more than 24 hours old, you may have to first soak the bedding in a large bucket, or even the bathtub. Then, you can get about the task of fighting that stain  which in most cases can take upwards to 5 to 10 minutes, depending on the density of the bedding, or upwards to a day or so if you have to soak the stain.
To remove blood stains from your washable cotton bedding find a good location to begin your stain removal efforts. Keep in mind as bedding is bulky when wet, you want to be near or in the bathroom or by a large sink to avoid water leaking on floors and/or carpet.
Douse the stain with a capful of shampoo, making sure that some shampoo touches every part of the stain.
Rub the soiled portions of the bedding until the shampoo is completely absorbed, then wet with cold or warm water. Once bubbles appear, briskly scrub the bedding. Rinse the stain and evaluate your efforts. Is the stain completely gone? Is their a slight ring showing the shape of the stain? Is the stain still visible? If any portion of the blood is still visible, including a light ring, then follow this step two or three more times. By the third time, fresh stains should be totally removed. However, if the stain has been allowed to sit in the bedding for 48 hours or so even if it is still visible after you attempted to remove by traditional machine washing than you will likely need to pour shampoo on the stain and soak the bedding for several hours. Overnight soaking is also possible, if you desire to do so. Once you have soaked the stain for the allotted time, then you can wash the bedding.
Cotton bedding that has been treated for blood stains by shampoo and rinsed can be washed according to your usual preferred methods and/or the manufacturers instructions. If you prefer bleaching your white cotton bedding, you can do so at this stage  be it liquid bleach for whites or non-chlorine bleach for colored bedding. Since the shampoo has been rinsed out of the bedding, it will not impair your detergent or bleachs cleaning ability.

Always check for stains before drying as the heat from a dryer will set the stain permenantly. If you are uncertain if the stain is removed from the damp bedding, hang outside in the sun to dry. The sun will not only help to bleach out any remaining stains, but it will dry the cloth in a way that will not further set the stain.

error

Enjoy this website? Please spread the word :)

Instagram
Follow by Email
RSS